

♥ Supplies Used ♥
“Ella” by Misticheskaya (HERE)
Do not use without a valid license
(PTU) “Runaround Sue NF” (HERE)
Mask 153 by Wee Scot Lass (HERE)
♥ Lets’ Begin! ♥
Create a new canvas 900x900. We’ll crop this layer.
Open frame 2 and re-size by 23%; center to your liking and save.
Open your tube of choice and add above your frame layer. Re-size first if needed (Mine didn’t)
Open paper 5 and re-size by absolute size 900x900. Place this underneath your frame and position to where the “sun” part is at the bottom of your frame--rising. Use an eraser to remove the rest of the paper.
Save your design as a *psd and name as you wish.
Open paper 5 and re-size by absolute size 900x900 and then apply your mask. Upsize by 110% and add below your frame ppr. Duplicate 2x and merge all layers together.
Open the lighthouse and add above your tube layer. Do NOT re-size. Position your element near the bent legs of your tube and then move below your frame layer.
Duplicate your lighthouse and move above your frame layer. Duplicate yet again and move above your tube layer. Rename these layers ‘lighthouse 2’ and ‘lighthouse 3’.
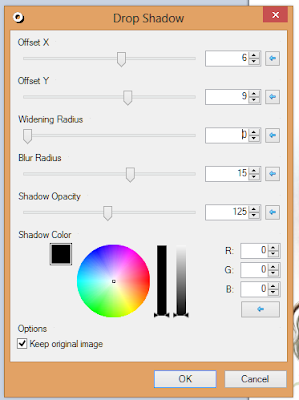
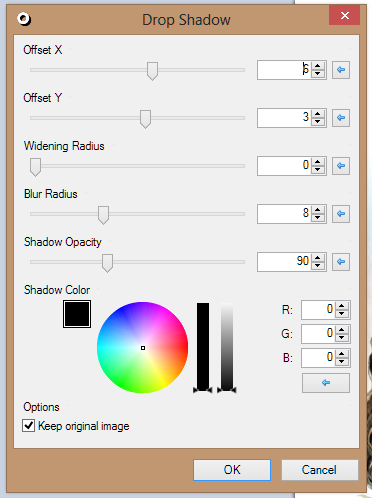
On lighthouse 3, use the below drop settings I used. You’ll see it makes your lighthouse stand out really well.
Use the eraser tool to delete all that hangs over her knees. Do the same for lighthouse 2 above the frame, but only on the part hanging on the right side OVER the frame.
Erase any of the lighthouse 1 layer that shows from underneath the frame.
Save Design.
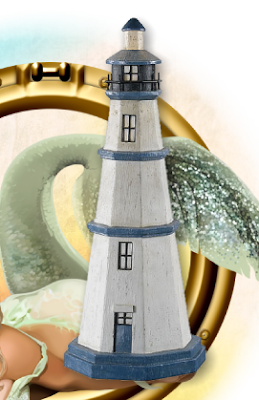
So far, it should look like this:
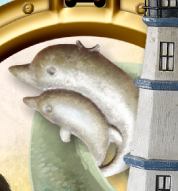
Open the dolphins and re-size by 15%. Add this above your tube layer, duplicate and move this second layer below your tube layer.
Drop shadow the top layer with the same settings you used with the lighthouse and then use your eraser to remove parts of it.
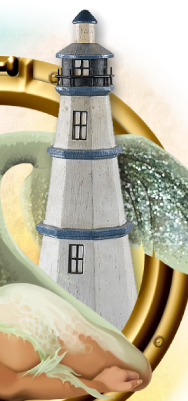
Now it should look like this:
Open bird 2 and re-size by 10%. Add above your lighthouse 1 layer and position on the lighthouse’s middle deck.
Return to bird layer: Layers> Flip Horizontal > drop shadow > flip horizontal.
Use your eraser to CAREFULLY erase the flower on the left hand side. I had to go slow and move between three layer—lighthouse 3, tube and flower. Each layer needed a small part erased for it to look right.
Open shell 1 and re-size by 25%. Add this above your frame layer and use the below rotation to move in into the desired location. You will still have to position it some to your liking.
Open shell 3, re-size by 15% and flip horizontal. Add this above your frame layer, but below your shell 1 layer.
Duplicate your frame layer. Layers > Flip Horizontal> Layers > Flip Vertical and use the flower drop to highlight the frame> Layers > Flip vertical > Layers > Flip Horizontal.
Drop the second frame layer normal (with the same settings) and merge the two together.
Open leaves 4 and re-size by 15%. Add above your frame layer and use the same rotation as you did for the shell. Layers > Flip horizontal and move it position. Use the same drop but do it 2x.
Open flower 4 and re-size by 20%. Use the same rotation as the other layers and then add this above your leaves layer.
Drop shadow any layers I have missed to your liking. Crop then add your name and copyright.
Save, upload to a photo sharing site and enjoy!
No comments:
Post a Comment