

“Cool Rain” tube by Ismael Rac (HERE)
“Atelas” Black (name)
“April Showers” by MIU Creation (HERE)
Water Stock by Moonglowlily (HERE)
Mask 84 by Wee Scot Lass (HERE)
Jasc Animation Shop 3
Vanderlee Snowflakes (HERE)
Eye Candy 4 Impact: Bevel
♥ Let's Begin! ♥
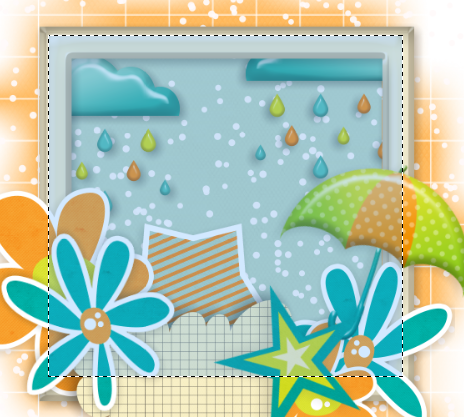
Open paper 7, resize to 900x900 and apply the mask. Add a new layer, flood-fill white, remove to under mask and then manually centre the mask layer. Name and save as a *psd.
Open the frame of your choice, resize by 23% (or 28% for the circle frames) and add to the canvas; centre.
Open your choice of paper, depending on what kind of frame you used; resize by 25% and add to your design.
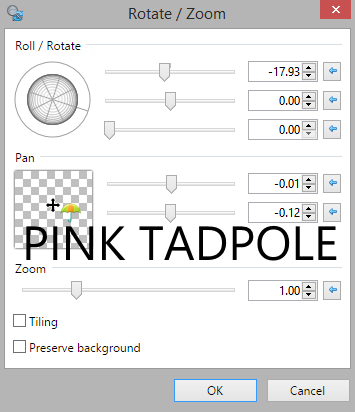
Open the umbrella, resize by 10% and add above the frame layer; position with rotation setting below once centered on the RIGHT side of the frame.
Open the star of your choice, resize by 20% and apply above the frame layer; position.
Open the second star of your choice, resize by 20%, apply rotation settings again and add above umbrella layer. (If using mine, flip first; position is different on both designs)
Open cloud 3, resize by 10% and position between the first large flower layers. Re-position to get the desired effect.
Open the tube, upsize by 125%, resize again by 95%, sharpen x2 and add over all layers.
Open the water splash, resize by 40%, add a new layer, flood-fill black and send to the bottom. I am doing this so it is more easily seen. Crop as close as you can to the water then delete the background and save again.
Resize the water image by 40% (45% for square) and add below your tube layer to the position. Flip before drop shadow.
Undo resize then resize again by 35% (40% for square) and mirror; add over the tube layer then flip before drop shadow.
Open the rain cloud of your choice, resize by 10% and add below your frame layer. Duplicate and mirror to merge and finish off the rain clouds.
Duplicate the mask layer before cropping; this is the final step. Delete second mask layer when complete.
Drop shadow all of your layers to your liking. Add your name and copyright now.
♥ Animation ♥
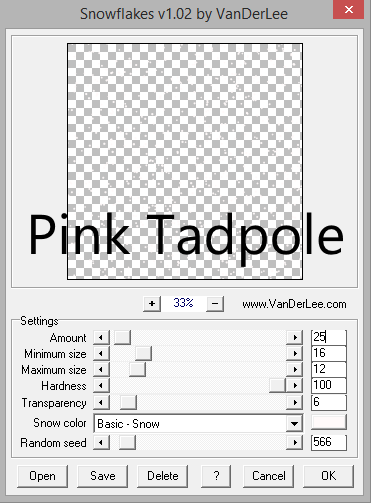
Add three new layers (rain 1, 2 & 3): Effects > Vanderlee snowflakes with the setting below on the first layer; for other two layers, increase the “random seed” option by 11 each time.
Grab your magic wand and, while on each layer, cut out a huge section that would be hidden by the frame itself. Then: Edit > Invert Selection > hit delete and the excess is gone.
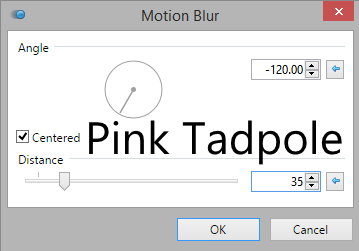
Go back through all of your rain layers and add the PDN Motion Blur settings below.
Highlight the first rain layer and hide the others. Go to the top layer and; Edit > Select All > Copy Merged > add to AS3 as a new image. Go back to PDN and Edit > Deselect.
Do the same above for the remaining two layers, hiding the previous as you go along. Once the transfer is completed, apply your optimisation settings and save.
Upload to a photo sharing site to enjoy.
No comments:
Post a Comment