
Eye Candy 5: Impact (Bevel, Chrome and glass)
♥ Lets’
Draw! ♥
Create a new 8x10 horizontal background, as shown below.
Un-check the “transparent” selection so that your background shows up white and
not PNG (also shown below).


Save your design now as a *psd called “Stained Glass.”
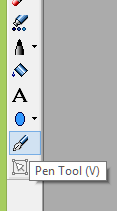
Click on your pen tool in your sidebar options and you’ll
see a change in your upper tool bar that associate with the pen tool usage.
First, we need to change the pen line, as shown below.
You want the solid line and none other.

Next, you want to change the width of your pen tool line
as well, so your outline really sets out. I’ve set mine to 75.00 (just type it
in) but you can do what you feel is best.

While holding down the shift button, run your pen line
along the outside of your canvas to create an entire frame for your starting
point. You do not have to keep adding a layer; just keep going and it will all
be on one layer. Convert this layer to raster when you have completed.


Return to the pen tool and using the same line width,
draw connecting lines from each of the corner to your elliptical center.
Convert to raster when completed.

Add a new set of connecting lines right on the inside of
your stained glass, as shown below. Convert to raster when completed.

Our drawing is now complete! Merge everything down until
it is on one layer. Do not merge with your white background.
Apply Eye Candy Chrome top your frame. From the drop down
menu, I used Shiny Hood and factory settings.
Apply your bevel settings as well. I used a rolling slope
and the settings below. I also applied these settings twice; once in the
initial stage and once after I had already beveled the frame.


♥ Lets’ Paint!
♥
First, scan the web for a paint palette you like. I chose
the one seen below. You’ll need this for your colour selections.

Click inside of any of your spaces around your stained
glass with your magic wand. Selections > Modify > Expand by 11 > Add a
new layer > Ok.
Flood-fill with your first choice of colour and then
Select none. Move this below your frame then repeat this process all around the
area you’ve chosen. Merge these layers together and rename “glass 1.”
** TIP!
** The fastest way to colour more than one area is to hold down shIft while
clicking inside of each area, then modify, add a new layer, flood-fill those
areas, select none and then move below the frame layer. It may take a spell but
it’s worth it.
Choose another colour and repeat the process above. Have
each colour on a separate layer. If you want more than one layer, rotate your
colours or add more for variation.
Re-size your design by 50%.
Click inside of each section of the frame yet again, but
this time apply the glass settings below. Use the same rolling slop as we used
with the bevel.
Duplicate each glass layer and apply the Xero porcelain
settings below to the duplicated layers only. Then, lower the opacity to 40.

Lower the opacity on the original layers to 60. This will
soften our colours.
Drop shadow to your liking and save. Now you have created a stained glass window! You have it saved in a *psd so you can edit it at any time.
Why not try your hand at my next tutorial for a stained glass window. I used it in a tutorial, found HERE.

No comments:
Post a Comment