

♥ Supplies Used ♥
Cami Con by Keith Garvey (HERE) & Kitty (HERE)
“OhPhoto Shoot” (name)
Photography by Neferwene (HERE)
Photography by S. Designs Scrap (HERE)
Vix’s Mask 364 (HERE)
Scan down to 15th May 2009 Set
Eye Candy Impact: Glass (for name)
“OhPhoto Shoot” (name)
Photography by Neferwene (HERE)
Photography by S. Designs Scrap (HERE)
Vix’s Mask 364 (HERE)
Scan down to 15th May 2009 Set
Eye Candy Impact: Glass (for name)
♥ Lets' Begin! ♥
Open neferwene paper 1, resize by 25% and apply your mask. Add a new layer, flood-fill white and send to the bottom.
Flip white background then center Align your mask. Name and save.
Duplicate mask and pull to the right until neatly centered down the right hand side. Merge.
Image > Rotate 90 counter-clockwise.
Open S.Designs’ frame and resize by 28% and add above your mask layer.
Open neferwene’s frame and add above the last frame layer.
Open S.Designs’ green paper, resize by 15 and add in your frame 2 layer.
Open neferwene’s film element and resize by 80%. Add this above the frame 2 layer.
Open S.Design’s bow, resize by 15% and add above your film layer. Duplicate then move one up and one down (see tag); Mirror to get the proper look.
Open S.Design’s leaves and resize by 15% then add underneath each bow layer; Mirror to get the proper look.
Open S.Design’s flower 2 and resize by 15% then add underneath the film layer. Manually place them where they are located.
Crop now to get closer to your mask layer. Grab the upper and lower middle nubs to smoosh your mask closer to your design and crop again.
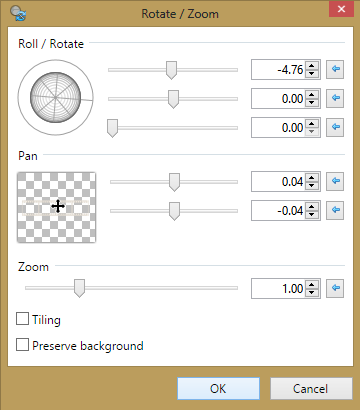
Rotate frame 1 layer by the settings below.
Resize your close up tube (mine is kitty) and add above your frame 1 layer.
Magic wand > click inside frame > edit > invert selection > delete on tube layer > move below frame.
Do the same for the opposite frame opening but mirror your tube before you do. Merge both layers after moving to under the frame.
Drop Shadow layers, resize to your liking then add your name with copyright. Upload to a photo sharing site to enjoy.
No comments:
Post a Comment