

“God Bless America” (Name)
Atomic Magenta Freebie by Flergs (HERE)
Mask 80 by DBV (HERE)
ICNET Filters Unlimited (HERE)
Eye Candy 4000 Bevel
♥ Let's Begin! ♥
Create a new canvas 1000x1000. Name and save as a *psd.
Open flower 10 and resize by 20% and add to your canvas; remove the brackets by flipping the white background.
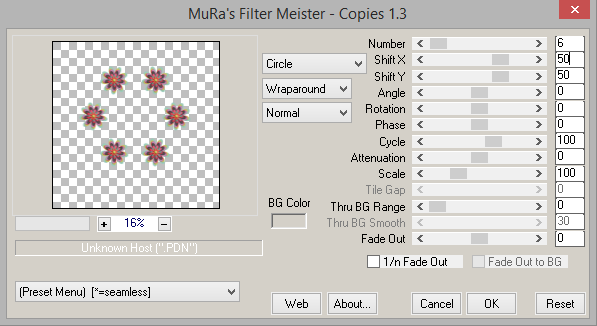
Go to Effects > Mura Meister’s Copies; use the settings below.
Resize canvas to 850x850. Add a new layer, flood-fill with your chosen colour from the flower and apply the mask. Center the mask behind your flowers.
Open flower 9, resize by 35% and add below the flower 10 ring layer; position between the two flowers on the left then duplicate and mirror.
Duplicate, flip and position slightly; merge the two flower 9 layers together.
Open flower 4, resize by 40% and add in the space (upper and lower) and merge together.
Open branch 2 and resize by 30%. Add this around the flower ring (near flowers) in different directions.
Undo resize of leaf and resize by 18%; add this below the top and bottom flower (near mask) and merge.
(Note: add any extra leaves as you please but don’t overload your design)
Pick the tube you wish to use and add to your canvas. I did not resize mine at all. Take to the mask layer and erase the excess.
Duplicate your tube layer and send one to the top. Drop shadow to your liking and then erase the excess.
Drop Shadow layers, crop or resize to your liking then add your name with copyright. Upload to a photo sharing site to enjoy.
No comments:
Post a Comment