

♥ Supplies Used ♥
“Golden Goddess” by Keith Garvey (HERE)
“Acryle Script” (Name)
“Green Valentine” by Regina Falango (HERE)
Animations by Lovey (HERE)
Animation Shop 3
Eye Candy Bevel
♥ Let's Begin! ♥
Create a canvas 1000x1000. Name and save as a *psd. Open element 41, resize by 50% and add to the canvas as your mask layer.
Open element 55, resize by 30% and manually centre over mask layer.
Open element 12, resize by 35% then add above the frame layer; position.
Open element 45, resize by 15% and then add to the lower right-hand corner.
Open element 35, resize by 45% and add in the upper left-hand corner.
Open element 16, resize by 35% and add below the tube layer; position near the silver button.
Open element 38, resize by 15% and add to the right silver button, positioning it on top.
Open element 10, resize by 25% and add below the last bird layer, left side.
Open element 13, mirror, resize by 25% and place near the white flower.
Open element 19, resize by 25%, duplicate (then merge) and then add below the silver button layer; move button layer up in layers box to above daisy.
Duplicate the daisy again and flip; move into position near the top of the bird.
Open element 14, resize by 15% and add over near the right silver button; duplicate, send to top and position over birds foot.
Open element 32, rotate to flat, resize by 55% and add above the frame layer.
Open papers 11 and 12: resize both by 20%, using the paper 12 for the posterior frame and paper 11 for the anterior frame. Erase excess of each with a large eraser on 75%.
Drop Shadow layers, crop or resize to your liking then add your name with copyright. If you wish your design to stay static, stop here.
♥ Let's Begin! ♥
I am using two different animations by lovely: Water Fountain and Water waves.
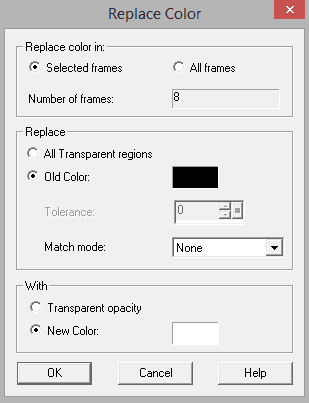
Open both animations in AS3. With water fountain: Select All > animation > flip animation > select all > animation > replace colour and then use the settings below to change the colour.
Delete all frames past frame 8 in both animations. We will not need them.
In PDN, hide all layers above the mask layer; Copy remaining layers into AS3.
Copy the water waves animation and add it into the frames at the bottom. I pulled my first one to the right and then paired up a second addition to the left. Keep in mind you’ll have to even them up.
Copy these eight frames and add them back to PDN as a new image—one at a time! Start with the first frame as a new image and all other frames as a new layer.
Save as a .PSD with the same file name, but add “ani” after the normal file name. EX: “Garvey Golden Goddess Ani”.
Hide the last two layers and unhide all layers EXCEPT the upper Garvey tube.
Copy merged all above layers and add above all the animation layers of the new design and title it “covering 1”; click Save.
Hide each animation layer in its’ turn and add these layers IN THE SAME MANNER back into AS3.
USE CAUTION! If you are going from 8-1 frames, place them BEFORE each other, not after. If placed after when going backward, the waves will go toward the design, not away from it.
Pull up the water fountain animation to tweaked earlier. Add this into all the frames as close as you can to the opening of the water pitcher.
Place every one of the frames (yet again) in PDN as you did before, replacing the old saved animation.
Hide all layers but the drop shadowed upper tube layer. Open this, highlight it in the layers box and copy. Add to the top of EACH frame layer then merge with the frame.
Add the chosen name and your copyright (never use without a proper license). Add back to AS3 to animate. When done, hit shift+z to add the optimisation settings.
Upload to a photo sharing site to enjoy.
No comments:
Post a Comment