
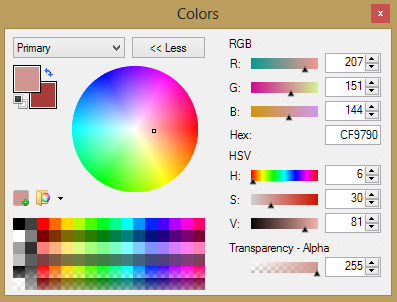
For my design, I pulled two different colours from my chosen tube and came up with these two: CF9790 and A83A38 in the order shown below.

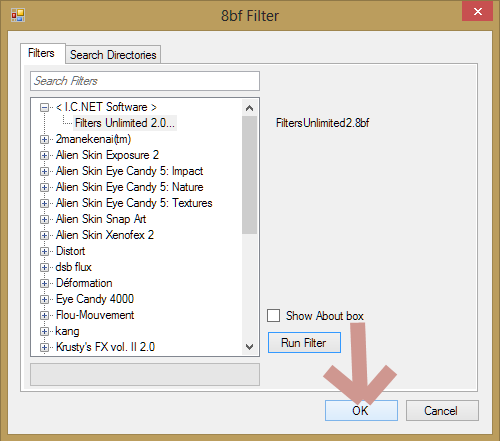
Go to Effects and find your 8bF section in your drop down menu.

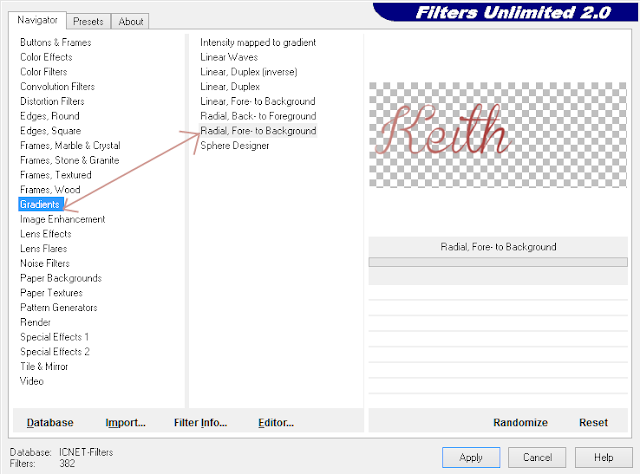
Once the box below pops up, find "ICNet Software". Click on the + sign to get a drop down that says "Filters Unlimited" and click to highlight.

Find Gradients on the left hand side and linear fore-back on the right hand side. Click apply when done.
Once the box disappears, just click OK on your original box. This will apply the gradient.
Now, go back to your 8bF filter and find your ICNet filters again. This time, find "Lens Flares" on the left and "Flare 01" on the right. Click apply when finished and then OK on the first box.
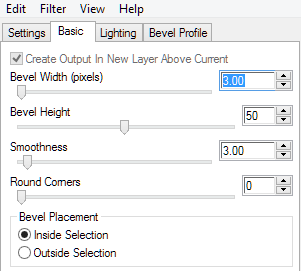
I also used Eye Candy Bevel on the following settings:
You can get a somewhat bevel by grabbing your magic wand, hold shift and click on the name. This will highlight the whole name. Then, go to Effects > Bevel and adjust it until you get your desired effect, Go to Edit >Deselect once you achieve your desired bevel.
Outline and drop shadow once done.
Once completed, merge all layers together, upload to Photobucket and enjoy!

No comments:
Post a Comment