

♥ Supplies Used ♥
“Sexy Nurse” by Elias Chatzoudis, HERE.
“DJB Jacked Up Kinda luv” by Darcy Baldwin, here.
“Coronary Heart Disease” by Crafted by Gina, here.
“DJB Jacked Up Kinda luv” by Darcy Baldwin, here.
“Coronary Heart Disease” by Crafted by Gina, here.
“Mask 227” by Gem, here
“Mask 177“ by Wee Scot Lass, HERE.
♥ Lets' Begin! ♥
Open paper 2 and apply mask 277 by Gem. Add a layer above, flood-fill white and move to the bottom. Save as a *psd under your chosen filename.
Open paper 1 and apply your mask 177 by Wee scot lass. Duplicate 4 times for 5 layers and then add above your last mask layer.
Open word art 1 and resize by 85%. Add this above your mask layer. Effects > Object > Object Align > Center both.
Outline the word art with the colour B30810 on 2/2, sharpen by 4 and then outline in white by 5/5.
Open the branch and add above all layers. Pull to one side, duplicate and then flip horizontal. Merge both layers.
Open flower 3 and resize by 80%. Add over all layers and center in the middle of the branches.
Open your tag and resize by 70%. Add this below your flower 4 layer and erase the chain.
Open Flower 6 and resize by 80%. Add this below your flower 4 layer. Duplicate and flip horizontal.
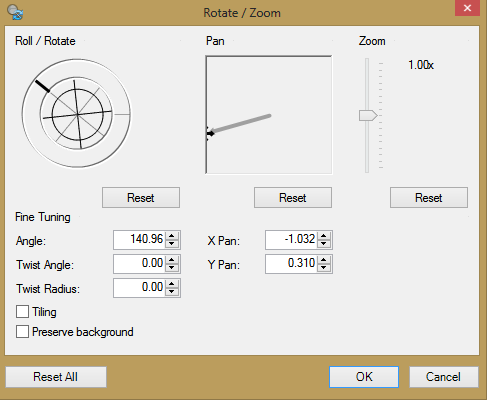
Open medicine bottle 3 and resize by 80%. Add below your right flower 6 layer and use the rotation below.
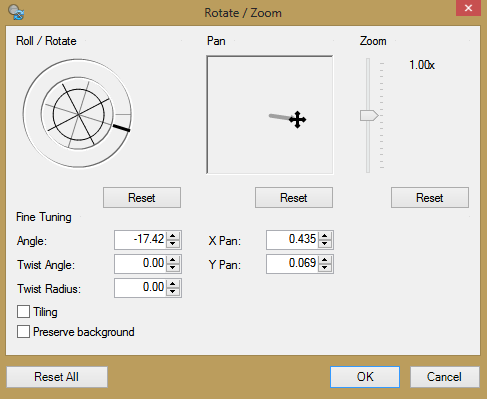
Open flower 4 and add below your flower 6 layer (left). Duplicate and then flip horizontal. Move up above your medicine bottle layer.
Open the pillbox and resize by 70%. Add below your flower 4 layer (left) and rotate by the settings below.
Crop as close as you can to the larger mask.
Open your tube and upsize by 115%. Sharpen by 2 and then add above your word art layer. Duplicate and move above all layers. Drop shadow this layer and erase the bottom of this tube.
Drop shadow all layer and resize to your liking. Add your name and copyright. Upload to a photo sharing site and enjoy!
No comments:
Post a Comment