“Fading Star” by Zindy Nielsen, HERE.
“Got That Bling” by Nick Curtis, here.
“A light in the Darkness” by Crafted by Gina, here.
“Got That Bling” by Nick Curtis, here.
“A light in the Darkness” by Crafted by Gina, here.
“Mask 84” by Wee Scot Lass, here.
♥ Lets' Begin! ♥
Open paper 4, resize by 25% and apply your mask. Add a layer above, flood-fill white and move to the bottom. Save as a *psd under your chosen filename.
Open frame 3 and resize by 27%. Add this above your mask layer.
Open the cage and resize by 17%. Place this above your frame layer and to the left.
Open the bird and resize it by 10%. Add this above your cage to position it on the bottom and then move below the cage.
Open the ivy, rotate counterclockwise and then flip horizontal. Resize by 20% and add above your frame layer. Position the bottom of the ivy with the bottom of the cage.
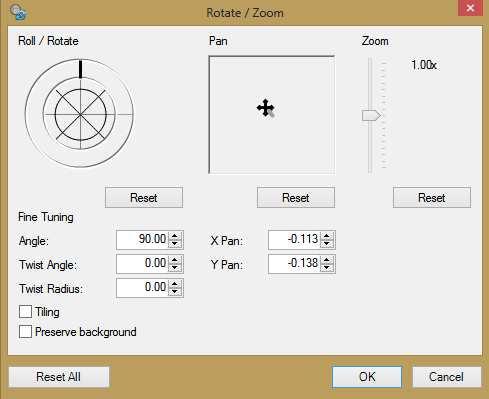
Duplicate the ivy and flip vertical. Then, apply the rotation settings below.

Open bow 2 and resize by 25%. Use your eraser to erase the right hand side of the bow then rotate clockwise. Add above your cage and then flip horizontal.
Add a layer above your frame and flood-fill with this colour: F2E100. Go to Effects > 8bf Filters > Paper Textures > Filter paper > Ok.
Open flower 2 and resize by 17%. Add above your ivy layers and move into the corner.
Open flower 4 and resize by 15%. Add below your last flower layer and pull to the top of the flower. Duplicate, flip horizontal and vertical then position at the bottom as well.
Open your tube and resize by 80%. Add above your frame paper layer and position to the left hand side.
Going back to your mask layer, duplicate and flip horizontal. Move into a position that pulls the duplicate over to the left slightly. Merge the two layers together.
Crop your image as close to your mask as you can and then drop shadow all of your layers.
Add your name, and resize to your liking. Upload to a photo sharing site and enjoy!


No comments:
Post a Comment