To create an animated design in Paint.Net requires just a bit more work then if you were using Corel PSP (or any other design program) but it can still be accomplished with a bit of patience. Once you get the hang of it, believe me, it becomes second nature and does get much easier with practice.
For animated designs in Paint.Net, you will need the standalone program called Animation Shop 3, which I purchased but have been recently told that you can get this program for free (but unsure as to where). Since it is a standalone program, it is also used by Corel PSP designers.
I am doing a simple glitter frame (and name) for this tutorial just to show you the basics of how to add a Paint.Net noise and how to add images to Animation Shop 3 (and back again).
Here is my main design, without a name or border. This free-to-use tube is by Brandi Ashton and is no longer available.
Go to Effects > Render > Border to create a border to your liking (you can choose thickness and style of line here). You can choose colours from your tube or overall design for the border. I am using two colours form my tube, a line thickness of 5 and a solid line style.
For my new addition below, I also added a linear gradient by Effects > ICNET > Filters Unlimited > Linear Waves > Apply > Ok. All because of the newly installed .8Bf filter we added a few tutorials ago!
I've rotated my image to add my name on either side because I want to animated this as well as the border. At this point, I also want to duplicate both the name and the border so that I can achieve 4 layers each--three as a noise layer for the name and border, one for outlining and drop shadowing the lower name layer, and one for the drop shadow on the lower border. Since this is also the size that I am normally going to use, I added my copyright now.
Now I want to add my noise for my glitter effect to the top three layers of both my border and name. This is easy since noise is a permanent plugin in Paint.Net. You can also use DSB Flux Noise as well if you have this plugin.
Effects > Add Noise > and use the sliders or the boxes to add your effect. If you wish to use my numbers, I used 35/50/75 on border one and then simply upped the intensity by 10 for the subsequent layers.
Open Animation Shop 3 to prepare for transferring your images (now called frames). Hide layers 2 and 3, and Edit > Select All > Copy Merged to grab your first frame layer and add to AS3.
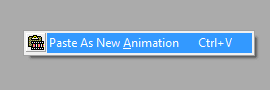
In AS3, right-click on the grey background and add your new animation.
Go back into Paint.Net, check the first border and name layer, uncheck the second layers and repeat the process in AS3 but adding it behind the first frame you added.
Right-click on your first image and then add behind the first frame image.
Once all three frame layers are in AS3, add your optimization setting (tutorial
HERE)and save. Congratulations! You have now created your first animated design in Paint.Net. You can safely save this design but it must be uploaded to a photo sharing site (like Photobucket or Fotki) to be able to use the animation. Otherwise, it will only look like glitter paint on a white background!
You can also safely save the original design in Paint.Net, as this is a simple glitter design. You do not have to have to re-insert the frames from Animation Shop 3 to Paint.Net but that is not always the same for other animated design.
You can learn how to transfer animated designs from Animation Shop 3 back to Paint.Net HERE.


No comments:
Post a Comment